-
[Assignment] 위스타그램 코딩 Chapter 1. login pageDevelope/Assignment 2020. 5. 1. 11:20

logo 1. 시작
◎ 위코드에서 프론트엔드 개발자를 희망하는 사람들은 HTML, CSS, Javascript repl.it 과제가 끝나면
인스타그램 클론 코딩 과제가 있다. 바로 "위스타 그램"이다.
repl.it 에 있는 위스타그램 로그인 페이지를 먼저 구현을 하였다.
2. 가이드
◎ html, css
-
로그인 전체를 감싸고 border가 적용된 div 태그가 필요하다.
-
input tag 사용 (type은 text 또는 password, placeholder는 속성을 사용하여 "전화번호, 사용자 이름 또는 이메일" 등의 값을 넣어주면 된다.)
-
button 태그를 사용
◎ javascript
-
id, pw에 각각 한 글자 이상 써야 버튼이 활성화되도록 해야 한다.(연한 파란색 -> 활성화되면 파란색으로!)
3. 레이아웃
◎ 위스타그램 로그인 페이지는 크게 신경 써야 할 부분은 없었다.
repl.it에 있는 login page 디자인을 보았다.

repl.it 로그인 페이지 디자인 위의 화면을 보면 login box가 화면의 중앙에 배치하고 안에
input 태그를 이용하여 구성하고 button tag, a tag를 사용하기로 하였다.
항상 하던 방식으로 html로 레이아웃을 먼저 구성하고 css를 입히기 시작했다.

westagam login layout 레이아웃만 구성한 화면이다. 이제 css를 입혀보자.
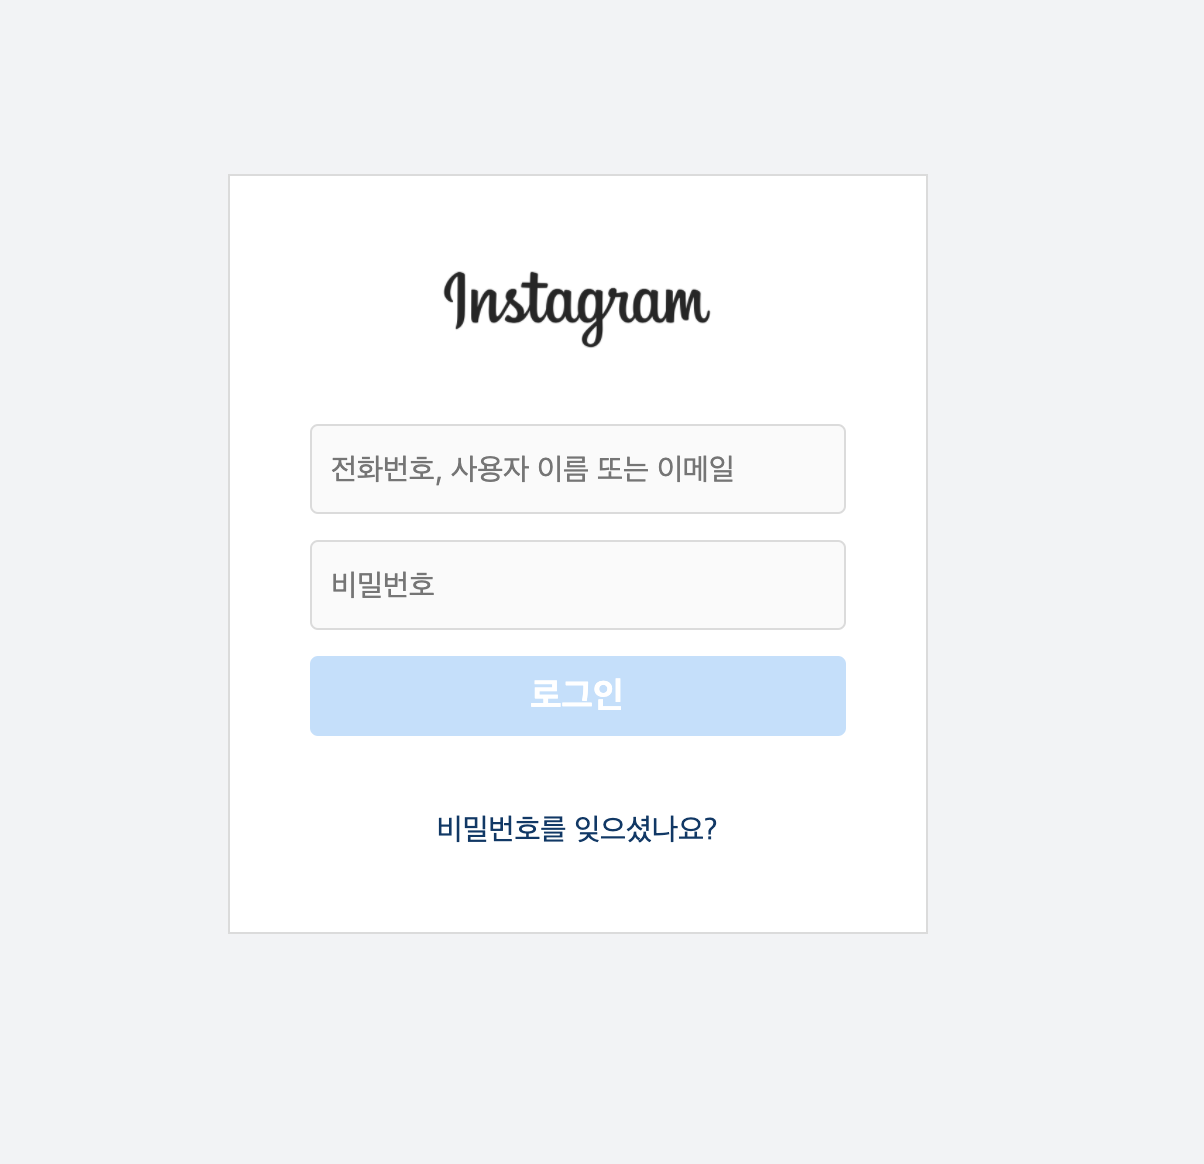
위스타그램 로그인 페이지 로그인 페이지는 중앙 정렬을 맞추고 안에 하나씩 css를 입히면 되서 시간이 오래 걸리지는 않았다.
4. 코드
◎ Html code
<div class="wrap"> <!-- container --> <div class="container"> <div class="inner"> <!-- header --> <header class="header"> <h1> <span class="header_tit">로고</span> <a href="#" class="page_move"> <img src="img/1600px-Instagram_logo.svg.png" src="logo"> </a> </h1> </header> <!-- //header --> <!-- form --> <form class="form"> <div class="input_box"> <input id="id" type="text" placeholder="전화번호, 사용자 이름 또는 이메일"/> </div> <div class="input_box"> <input id="password" type="password" placeholder="비밀번호"> </div> <div class="button_box"> <button type="button" class="btn" disabled="disabled"> <span>로그인</span> </button> </div> </form> <!-- //form --> <div class="password_forget"> <a href="" class="page_move"> <span>비밀번호를 잊으셨나요?</span> </a> </div> </div> </div> <!-- // container --> </div>-
레이아웃은 크게 container, header, form 으로 나누었다.
-
header tag 안에는 img 태그를 사용하여 logo를 나타내었다.
-
form태그 안에는 id의 input, password의 input, button으로 나누었다.
-
마지막에는 a태그를 사용하여 페이지가 이동될 수 있게 구현하였다.(가이드에 없어서 직접적으로 구현은 안 했지만, 실제로 구현할 것을 생각해서 a태그 사용)
◎ css code
※ css의 내용은 많기 때문에 주요 css 코드만 봐보자.
.wrap { height: 100vh; } .wrap .container { display: flex; justify-content: center; align-items: center; height: 100%; background: #f1f3f5; } .wrap .container .inner { width: 350px; height: 380px; padding: 10px 40px; box-sizing: border-box; background: #fff; border: 1px solid #dbdbdb; }-
최상위 부모인 .wrap class에 height : 100vh로 설정하였다.(100vh는 뷰포트 기준 100%를 차지한다. vh 단위를 사용하면 화면이 커지더라도 원하는 위치에 배치할 수 있다.)
-
.container class를 가진 div에 container안에 있는 자식 요소들이 화면 중앙에 배치할 수 있도록 display: flex를 사용하였다.
-
.inner class를 가진 div에 border를 사용하였다.
◎ Javascript code
- 처음 작성한 코드
const inputId = document.querySelector("#id"); const inputPassword = document.querySelector("#password"); const button = document.querySelector(".btn"); inputId.addEventListener('keyup', function(e){ let idValue = inputId.value; let passwordValue = inputPassword.value; if(idValue.length > 0 && passwordValue.length > 0) { button.disabled = false; button.style.cursor = "pointer"; button.style.backgroundColor = "#1c7ed6"; //0095F6 }else { button.disabled = true; button.style.cursor = "default"; button.style.backgroundColor = "#bfdffd"; } }); inputPassword.addEventListener('keyup', function(e){ let idValue = inputId.value; let passwordValue = inputPassword.value; if(idValue.length > 0 && passwordValue.length > 0 ) { button.disabled = false; button.style.cursor = "pointer"; button.style.backgroundColor = "#1c7ed6"; //0095F6 }else { button.disabled = true; button.style.cursor = "default"; button.style.backgroundColor = "#bfdffd"; } });-
DOM에 접근하여 해당 요소들을 전역 변수로 선언하였다.
-
inputId, inputPassword에 'keyup' 이벤트를 연결하여 함수를 따로 선언하지 않고 안에다 코드를 하였다.(중복된 코드 발생.)
위의 방식으로 하면 중복된 코드가 발생한다.
해결책을 찾아보고 다음과 같이 다시 구현하였다.
const inputId = document.querySelector("#id"); const inputPassword = document.querySelector("#password"); const button = document.querySelector(".btn"); function loginBtn() { let idValue = inputId.value; let passwordValue = inputPassword.value; if(idValue.length > 0 && passwordValue.length > 0) { button.disabled = false; button.style.cursor = "pointer"; button.style.backgroundColor = "#1c7ed6"; }else { button.disabled = true; button.style.cursor = "default"; button.style.backgroundColor = "#bfdffd"; } }; inputId.addEventListener('keyup', loginBtn); inputPassword.addEventListener('keyup', loginBtn);-
inputID, inputPassword에 'keyup' 이벤트를 연결하여 loginBtn이 호출되게 사용하였다.
-
loginBtn 함수는 inputId, inputPassword가 이벤트 되었을 때, 실행되어야 할 로직을 구현하였다.
5. 최종 결과
◎ 디자인에 맞게 구현하였고, id와 password의 값이 없을 때는 버튼 비활성화, 값이 있을 때는 버튼 활성화를 하였다.
결과 6. 느낀 점
-
시멘틱 태그를 사용하여 SEO에 더 좋은 코드를 작성하는 게 좋을 거 같다. 물론 그 상황에 맞게 사용하여야 한다.
-
flexbox는 정말 유용하며 좋은 css이다. 필요할 때 언제든지 flex를 사용해도 된다고 하셨다.
-
처음에 js에서 event를 구현해줄 때, function에다 직접 구현하여 같은 코드가 중복되었다. 중복된 코드를 함수로 따로 선언하여 구현하면 중복된 코드는 줄어들고 더 좋은 코드가 작성된다.
※ 참조
https://developer.mozilla.org/ko/docs/Web/API/EventTarget/addEventListener
EventTarget.addEventListener()
EventTarget의 addEventListener() 메서드는 지정한 이벤트가 대상에 전달될 때마다 호출할 함수를 설정합니다.
developer.mozilla.org
- Git
https://github.com/JinDevT/fast-html-css/tree/master/westrgram
JinDevT/fast-html-css
Contribute to JinDevT/fast-html-css development by creating an account on GitHub.
github.com
'Develope > Assignment' 카테고리의 다른 글
[TIL] 자기소개 페이지 Chapter 3. 모달창 만들기 (0) 2020.05.07 [Assignment] 위스타그램 코딩 Chapter 2. main page (0) 2020.05.02 [TIL] javasciprt 만 나이 계산하기 (0) 2020.04.23 [Study] 인스타그램 클론코딩 Chapter 1. (0) 2020.03.31 [Study] 자기소개 페이지 Chapter 2. (0) 2020.03.27 -